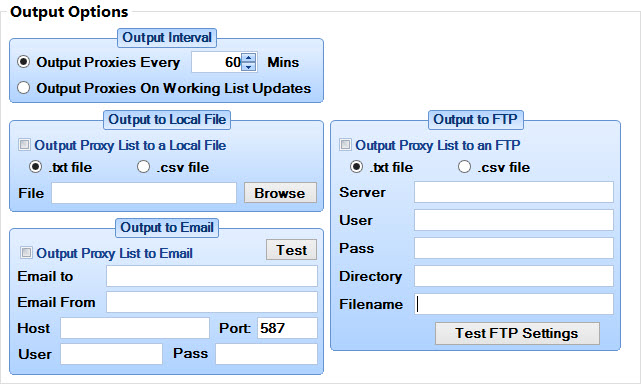
Output Interval

Ouptut Proxies Every X Mins: Select this option and set the number of minutes between outputting your proxies to your chosen destination(s).
Output Proxies on Working List Updates: This will output the proxies to your chosen destination(s) every time the working proxy list is updated with
Output to Local File

Output Proxy List to a Local File: Check this to enable outputting of proxies to a file on your local machine
.txt File / .csv File: Select whether you want to output your proxies to a .txt file or a .csv file. The .txt file will contain nothing but a list of proxies with one per line whereas the .csv file will contain all miscellaneous information such as latency, region etc
File: Enter the location and filename you want to output to, alternatively use the browse button for this
Broswe Button: Clicking this will load up a standard Windows save file dialog box where you can choose where you want the file to be output and its name.
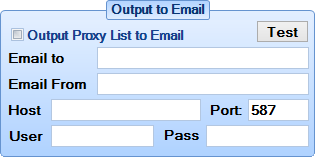
Output to Email

When outputting to an email address you will need to send it from a genuine email address so you will need to get the desired email connection settings, normally these will be called the smtp settings and you should be able to get these settings directly from your email provider or by searching for them online. I will be setting up a list of settings for common email providers soon but in most cases they are readily available.
Output Proxy List to Email: Check this to enable outputting of proxies to an email address
Email to: This is where you want the proxy list email to be sent to
Email From: This is the email address that you will be sending them from
Host: This is the email provider host, often this is referred to as the SMTP address
Port: The port used by your email provider, in the huge majority of cases this is 587 so unless it says otherwise it is advised to leave this set to 587
User: The username you use to login to the email account being used to send the email, remember this may include the @domain.com section
Pass: The password for the account being used to send the list
Test Button: Use this button to check that the login details entered are correct and working.
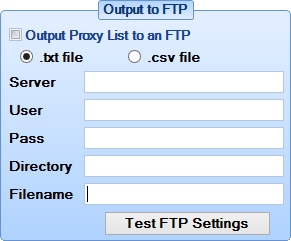
Output to FTP

Output Proxy List to an FTP:
.txt / .csv file: Select whether you want to output your proxies to a .txt file or a .csv file. The .txt file will contain nothing but a list of proxies with one per line whereas the .csv file will contain all miscellaneous information such as latency, region etc
Server: The full ftp address used to access your FTP address, e.g ftp://ftp.domain.com
User: The full username used to access the FTP server
Pass: The password used to access the FTP server
Directory: The directory (if not the root directory) that you wish to write the file to
Filename: The filename you want for the file on the FTP server
Test FTP Settings Button: Test the settings entered for writing to an FTP server
